The Preface
I know, I know, I am starting with a demo that was built on so many preceding efforts that trying to encapsulate it in a single post seems daunting at the least. But before you write this off as indistinguishable from magic, the reason for skipping to the end of the book is a valid one. I was sitting on a Discord chat the other day, discussing some ESPHome voodoo, when lo and behold, the great gatekeeper of the HomeAssistant project asked for someone to volunteer some video of the recent ESP32 Camera integration. Having just the other day taken a small clip for my students to demonstrate some of the neat things they can do with the skills they pick up in this field, I quickly posted my video. It turns out the submission was to be displayed on the release page, and that catches us up to this present moment.
The Assumed
Since this is the glorified first post, and you have found your way to a brand new blog, I am going to take a leap of faith and assume you were brought here from the post on the HomeAssistant release page. Failing that, you moseyed on over via the comment section on the YouTube video.
That leads me to believe, you probably have some experience in HomeAssistant. You might not be versed in the ways of the ESPHome, or the Systems on a Chip that are ESP32/8266's, and if that is the case I will try to be slightly more verbose. However, with such a large topic, I highly recommend deploying your Google kung fu on anything I may not fully expand upon. To get started, go on over to the ESPHome website and follow the excellent documentation they have provided.
The Objective
Well, this one was easy, a simple way to be able to see who actually walked through my office door. It is easy to do something like 'Someone walked through the door', there are plenty of solutions to this issue.
- The already existing PIR motion sensor pointed at the door
- An Ultrasonic sensor aimed at the door, measuring for distance discrepancies
- A laser trip sensor that is broken when someone walks through said door
- An already existing web camera running with something like motiond, measuring frame noise and deducing motion based on that
- Countless others, I am sure
However great all of these solutions are, they still leave me with one glaring issue. I may know someone (or something, you may also be blessed with countless fur babies) has breached a threshold, but that still leaves the who.
With the who established, I can modify my automation to take into account the initiator of said event. This affords me the ability to do things like, Oh, I entered the office, cool, turn on the computer (Wake on LAN), no wait a minute, that's not me, SOUND ALL THE ALARMS.
The Requirements
- An ESP8266 with a PIR sensor on it facing a choke point (such has a doorway)
- An ESP32 Camera, facing the same doorway positioned optionally to center an average human being's face in frame
- Optional (Maybe): If you purchase the same AI-Tinkerer camera I did, keep in mind it does not have a built-in serial adapter, in fact it does not have USB, period. In this situation, you will also need the following:
- A soldering iron
- A FTDI USB-TTL adapter for the initial flash, all subsequent firmware updates can be done via OTA
- A Micro-USB breakout to provide the 5V power the device requires
- Something running HomeAssistant, be it a Raspberry Pi, or a full x86 platform
- Docker installed on something, running a Facebox container
- Micro-USB power bricks. The one with the PIR sensor can be just about anything, for example, one of the 900 Apple white IPhone blocks. The ESP32 Camera is a little more power starved, and in my experience requires a minimum of 2 amps.
- Optional: 3D printer so you can have a significant other appeasing experience, versus exposed PCBs taped to the wall.
Why two chips? The ESP32 camera is a wonderful $8 USD ~ chip that comes included with a OV camera module, and sure it does have some additional pinouts that we can include the PIR sensor as a complete package, however the already daunting power consumption and heat generated from the camera leads me to think trying to add the PIR sensor on it would produce entirely too much noise. This would lead to things such as the annoying device dropping, or my least favorite, false positives. With the cost of the ESP8266's being like $4 USD at this point, I have opted to let the automation system do the heavy lifting, leaving these two discrete devices not being responsible for knowing the other exists.
The Configuration
ESPHome Primer:
In complete transparency, I do not use Hass.io, I do however have the majority of the services running in my home, on a Docker Swarm stack spread over a few computers. Since I would like to keep this initial post simple, and I have assumed you are already familiar with HomeAssistant, I am going to link the documentation provided for getting ESPHome running through Hass.io. For those of you not using Hass.io, you can find additional information on getting started with ESPHome through the CLI here.
ESP8266 NodeMCU:
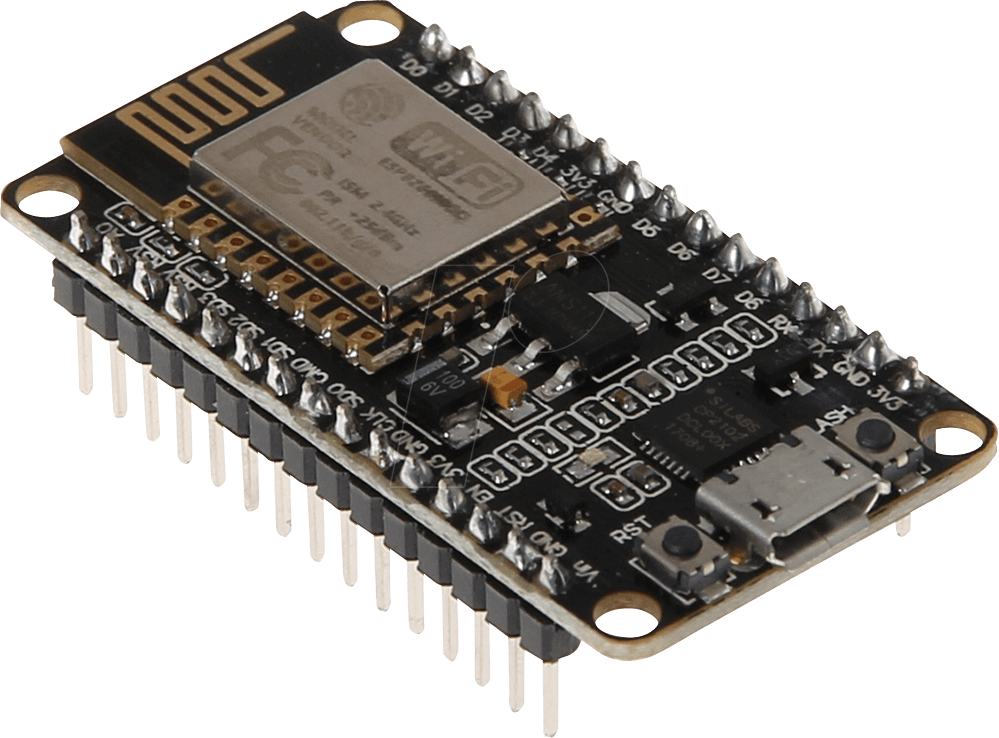
This is used to fire the initial presence detection. One of the issues with the ESP32 camera is running hot. I have seen more expensive versions on eBay that come with better thermal design, and even a few with included heat sinks, but this only really factors in if you want to real-time monitor the camera for extended periods of time. I have yet to have any issues with casual monitoring (opening up the camera feed via HomeAssistant and watching for maybe 5 to 10 minute sessions). The camera only turns on when it is active, so aside from the updates HomeAssistant requires to update the still image on the Lovelace UI, if we only grab a still image when motion is detected, we avoid a lot of the heating/power consumption issues.
Keep in mind, I am using a LOLIN NodeMCU for this, but that is because I have many other things on this chip:
- Temperature / Humidity
- 0.96 inch OLED display
- RGB LED
- IR Blaster LEDs
I also enjoy things like:
- Built-in power regulation
- Built-in USB-TTL
- Built-in FLASH / RESET buttons
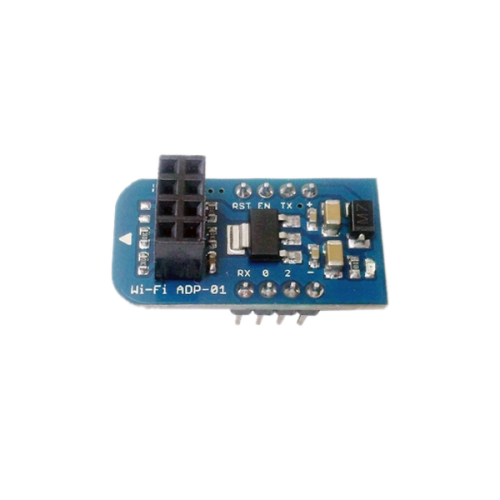
That being said, if you want to keep the package small, and you are only using it to trigger a PIR sensor, there is no reason you could not drop down to something like an ESP-1.
There are also many options to trigger, but for the sake of simplicity, let's just focus on a PIR sensor.
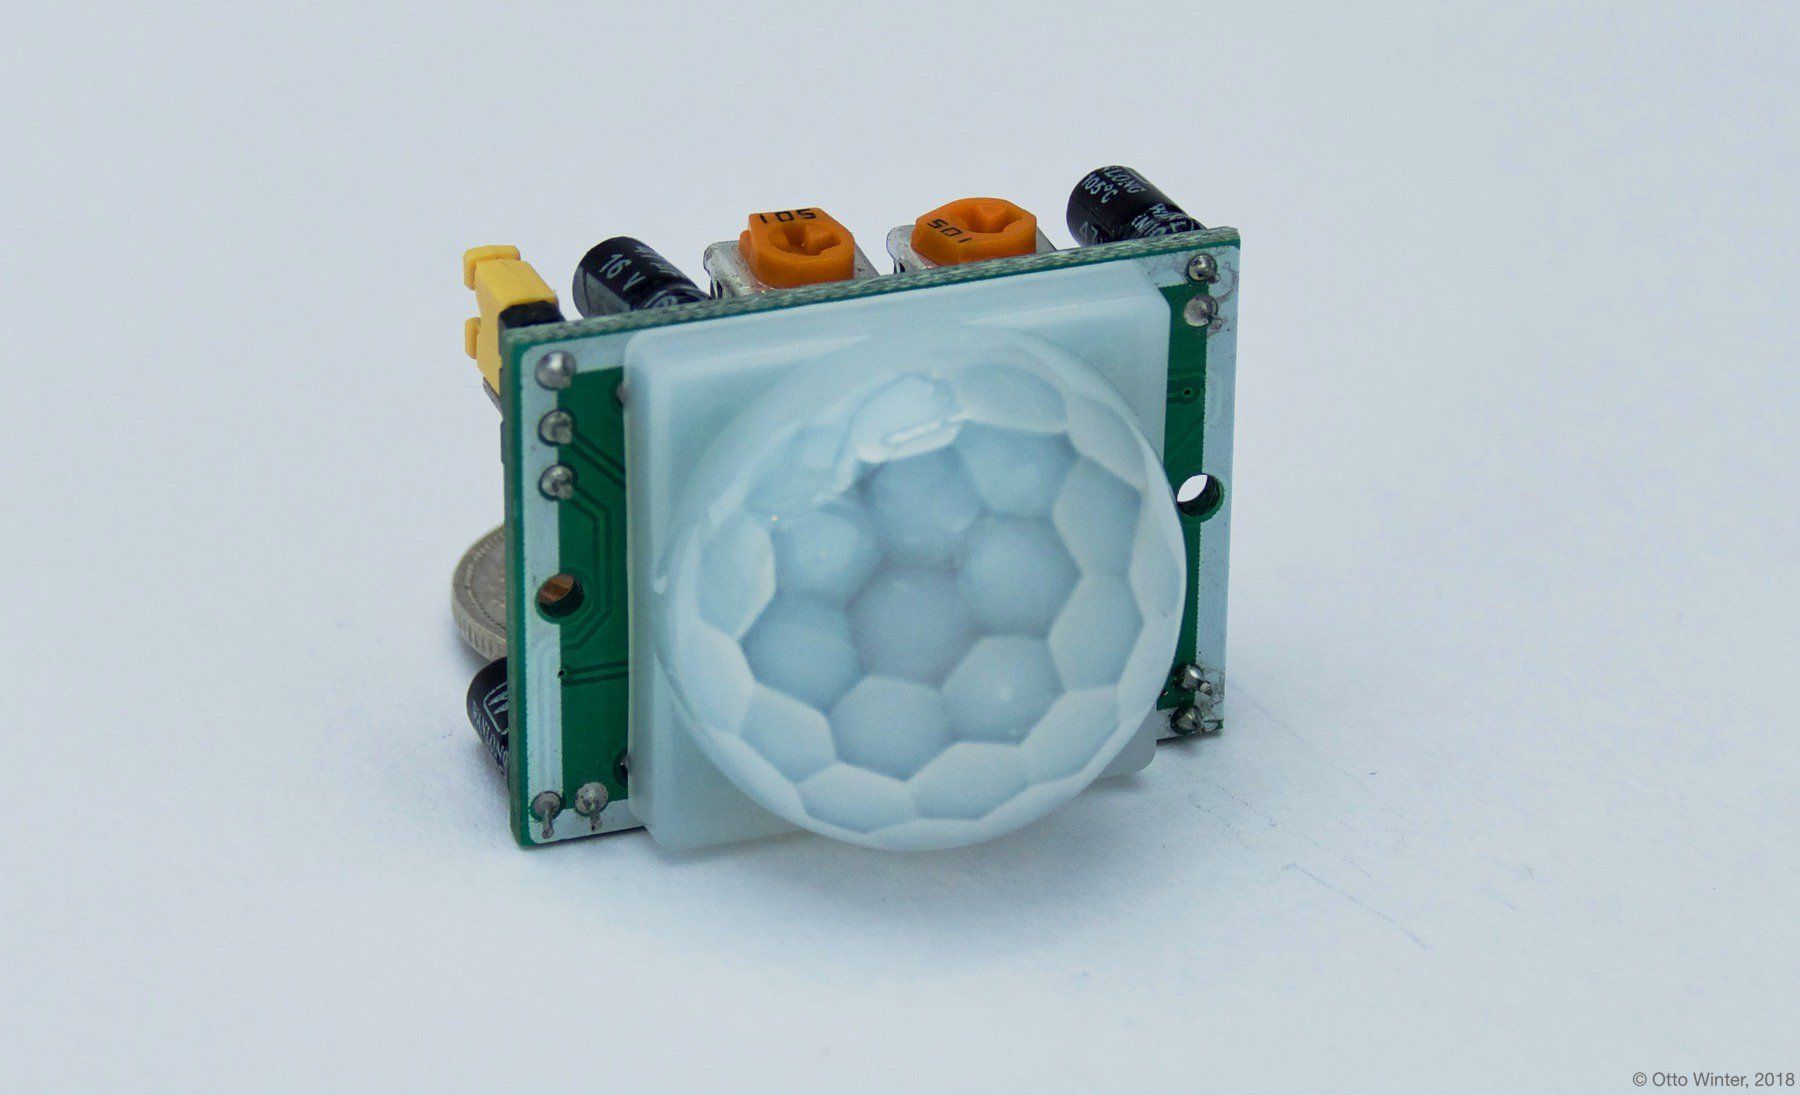
You can find the documentation for ESPHome integration with this sensor here, with a recommended follow-on article explaining the science behind this here.
If you are interested in my exact configuration (abbreviated for just the PIR sensor), feel free to use this other detection sensor as an example, the one I am using for this project includes way too many components. Do keep in mind I make use of the secrets and includes (although I have tried to un-refactor the parts that matter) feature of ESPHome, so read the documentation fully before beginning. Also, change it to reflect the environment you are operating in :P
Detect1.yaml
## BEGIN CONFIGURATION ##
substitutions:
  gateway: 192.168.1.1
  subnet: 255.255.255.0
  dns1: 192.168.1.2
  dns2: 8.8.8.8
  web_port: "80"
  platform: ESP8266
  board: nodemcuv2
  core: dev
  arduino: recommended
  status_led: D0

  ## Identity
  room: office
  upper_room: Office
  devicename: detect1
  upper_devicename: Detect1
  static_ip: 192.168.1.175
  logger_level: VERBOSE

  ## Features
  pir_a_pin: GPIO4

esphome:
  name: $devicename
  platform: $platform
  board: $board
  build_path: builds/${devicename}
  esphome_core_version: $core
  arduino_version: $arduino

status_led:
  pin:
    number: $status_led
    inverted: True

wifi:
  ssid: !secret primary_ap
  password: !secret primary_ap_psk
  manual_ip:
    static_ip: $static_ip
    gateway: $gateway
    subnet: $subnet
    dns1: $dns1
    dns2: $dns2

api:

logger:
  level: $logger_level

ota:
  password: !secret ota_password

time:
  - platform: homeassistant
    id: time

# Sensors
binary_sensor:
  - platform: status
    name: ${upper_devicename} Status
  - platform: gpio
    pin: $pir_a_pin
    name: ${upper_room} Motion
    device_class: motion


sensor:
  - <<: !include includes/common/wifiSignalSensor.yaml
  - <<: !include includes/common/uptimeSensor.yaml

text_sensor:
  - <<: !include includes/common/versionTextSensor.yaml
  - <<: !include includes/common/wifiInfoTextSensor.yaml

# Individual switches
switch:
  - <<: !include includes/common/restartSwitch.yaml
  - <<: !include includes/common/shutdownSwitch.yaml
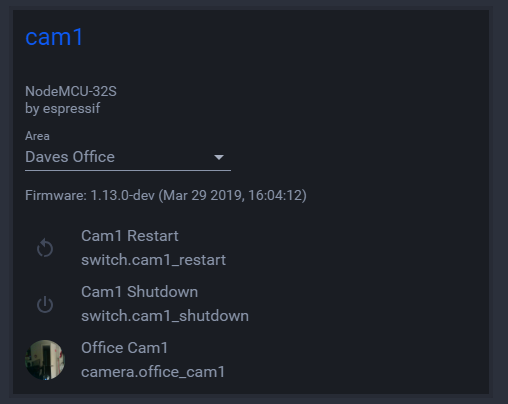
AI-Tinkerer ESP32 Camera:
If you spent a little more $$, and have a camera that provides USB-TTL and Power on board, great! You do not really need to do a whole lot other than flash the initial firmware. Otherwise, you will need to identify the RX/TX/VCC/GND pins and physically hook up the board to a computer to perform the initial flash. You will also have to add something to power the camera when it is not being flashed. This is where I used a breakout (linked in requirements list) in conjunction with a 3D printed case. This is a little hard to write instructions for as there are many makes and models of the ESP32 camera. I was able to find a YouTube video of someone flashing the Espressif code example, hardware-wise it is very similar. The biggest difference is we will not be using the Arduino IDE, rather ESPHome (through Platform.io). This video demonstrates another nifty thing this device is able to do, not just specific facial identification, but abstract facial recognition and count.
The camera I linked via eBay in the above section will work out of the box using a configuration provided in the ESPHome docs. If you are interested in my exact configuration, it looks a little something like this (Please keep in mind I am using the substitutions feature to reduce copy-pasta, and the secrets feature to remove passwords and other sensitive data from these configurations, you can find more in the ESPHome docs).
Camera1.yaml
# Subs
substitutions:
  ## BOOTSTRAP
  gateway: 192.168.1.1
  subnet: 255.255.255.0
  dns1: 192.168.1.2
  dns2: 8.8.8.8
  web_port: "80"
  ## Identity
  room: office
  upper_room: Office
  devicename: cam1
  upper_devicename: Cam1
  static_ip: 192.168.1.205

  logger_level: VERBOSE
  ## Hardware
  platform: ESP32
  board: nodemcu-32s
  core: dev
  arduino: recommended

# Bootstrap
esphome:
  name: $devicename
  platform: $platform
  board: $board
  build_path: builds/${devicename}
  esphome_core_version: dev
web_server:
  port: $web_port
wifi:
  ssid: !secret wifiSSID
  password: !secret wifiPassword
  manual_ip:
    static_ip: $static_ip
    gateway: $gateway
    subnet: $subnet
    dns1: $dns1
    dns2: $dns2
api:
logger:
  level: verbose
ota:
  password: !secret otaPassword

esp32_camera:
  external_clock:
    pin: GPIO0
    frequency: 20MHz
  i2c_pins:
    sda: GPIO26
    scl: GPIO27
  data_pins: [GPIO5, GPIO18, GPIO19, GPIO21, GPIO36, GPIO39, GPIO34, GPIO35]
  vsync_pin: GPIO25
  href_pin: GPIO23
  pixel_clock_pin: GPIO22
  power_down_pin: GPIO32
  resolution: XGA
  brightness: 2
  jpeg_quality: 10
  # Image settings
  name: ${upper_room} ${upper_devicename}

switch:
  - <<: !include includes/common/restartSwitch.yaml
  - <<: !include includes/common/shutdownSwitch.yaml
Facebox:
Facebox is the magic sauce image processor with their claim to fame being
'Facebox detects and identifies faces in photos. You can teach facebox with as little as one sample image.' - https://machinebox.io/docs/facebox
I am taking the black box approach to this, I have little understanding of what is happening inside this docker container (aside that it does like to eat CPU resources), and I am trying to keep it that way.
The setup I followed was provided by the HomeAssistant documentation, and can be found here. My configuration for this is fairly simple right now, and I will be sure to post more as I expand on the system.
Do keep in mind there is no persistence on the docker image they provide, one thing I do plan on adding is a script inside of HomeAssistant that provisions the Facebox container via its REST API, by feeding it faces stored in the web directory in the HomeAssistant config. Until then, I fed it following the guide by manually calling it via curl.
Update:
As Gary pointed out in the comments, you can save the state once you have initially seeded the box. By putting this state on a web server accessible to the docker node, you can seed it on creation. With this solution you only really need to train the box once, but do keep in mind if you later update the box you should go through the steps of backing up the state to said web server. If you want to remain within HomeAssistant, you could have a script run locally or remotely via SSH and place it on an interval-triggered automation.
If you do not mind breaching the confines of HomeAssistant, you could just write a one-liner bash script and throw it in Cron.
Once your box is initially seeded, modify your Docker compose file and add the following:
The Environment variable to identify the state file seed
- MB_FACEBOX_STATE_URL=<WebAddressToStateFile>
Partials from my personal configruation
Partial: homeassistant/config/configuration.yaml
  image_processing:
    - platform: facebox
      ip_address: !secret faceboxip
      port: 8089
      username: !secret faceboxuser
      password: !secret faceboxpassword
      source:
        - entity_id: camera.office_cam1
          name: OfficeCam1
Partial: docker/composefiles/homestack.yaml
version: '3.2'
services:
  ## Facebox
  facebox:
    image: machinebox/facebox:latest
    depends_on:
      - dnsmasq
    environment:
      - MB_BASICAUTH_USER=<REDACTED>
      - MB_BASICAUTH_PASS=<REDACTED>
      - MB_KEY=<REDACTED>
      # Only added once the initial seed is completed and the state file exported
      # to an accessible Web Server
      # - MB_FACEBOX_STATE_URL="https://allthestatefiles.changeme.com"
    networks:
      - home_network
    ports:
      - 8089:8080
    deploy:
      mode: replicated
      replicas: 1
      labels: [APP=facebox]
      restart_policy:
        condition: on-failure
      placement:
        constraints: [node.hostname == <REDACTED>]
HomeAssistant:
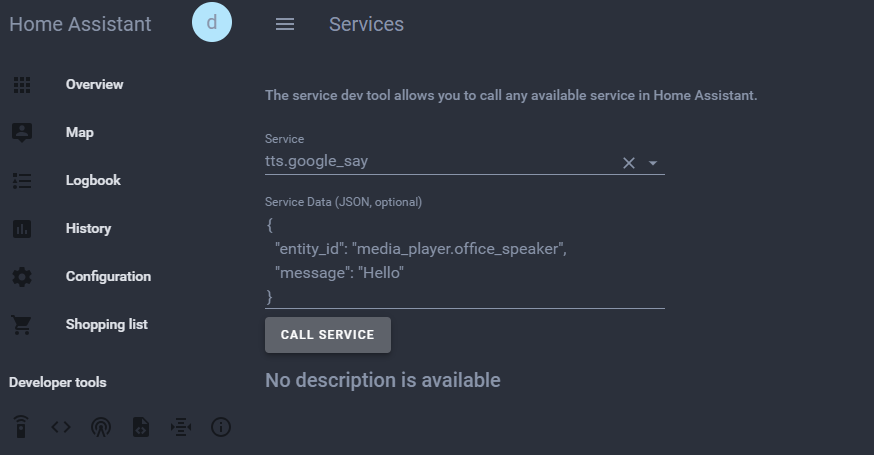
In the video, you saw me trigger a PIR sensor, that then alerted HomeAssistant of its state change, that was then picked up by an automation, that then caused an image process on a camera, that then reported its results to a Google Home speaker. Honestly, it was harder to quantify that in English than it was to just write the three simple automations required. So let's just do that. Keep in mind, I have imported the camera into HomeAssistant as camera.officecam1 and the PIR sensor is binary_sensor.detect1_motion. When training Facebox, I used davericher in the name field.
This of course requires you to have followed the ESPHome primer, having all your chips already configured in the integrations section of HomeAssistant.
partial: homeassistant/config/automations.yaml
# Analyze Faces in office On motion
# This fires when the PIR sensor goes off
- alias: Motion to Image Office
  initial_state: on
  trigger:
  - entity_id: binary_sensor.detect1_motion
    from: 'off'
    platform: state
    to: 'on'
  action:
  - service: image_processing.scan
    entity_id: image_processing.officecam1

# Faces Detected in the Office
# This fires when a reasonable hit is returned by the image processor
# It is also responsible for the actions
# This is a simple way of doing it for 1 person, you can also use the trigger event
# data and not specify a specific person to match. This would allow you more custom
# options using a data_template
- alias: Face Reconginzed In office
  initial_state: on
  trigger:
    platform: event
    event_type: image_processing.detect_face
    event_data:
      name: 'davericher'
  action:
  - service: tts.google_say
    entity_id: media_player.office_speaker
    data:
      message: Hello Dave
HomeAssistant Google Assistant:
The voice component is fairly simple. If you have Google Home devices on the same network as HomeAssistant and Discovery is turned on, they should show up as media_player entities. This also provides you a tts.google_say service you can easily call into an automation. You can see an example in the above snippet in the actions section.
In regard to voice commands, there are a few ways to feed into Google Assistant, the best way in my opinion is having a HomeAssistant server that is properly set up to be exposed to the outside world (which does not require things like IFTTT). This allows you to use the Google Assistant component in HomeAssistant. Entirely outside the scope of this post however are the obvious security implications you face when doing this. HomeAssistant has plenty of documentation on this topic, including Nginx Proxying, SSL using LetsEncrypt, etc etc. I strongly recommend you follow all security setup word for word before exposing your home automation system to the outside Internet.
HomeAssistant LoveLace UI:
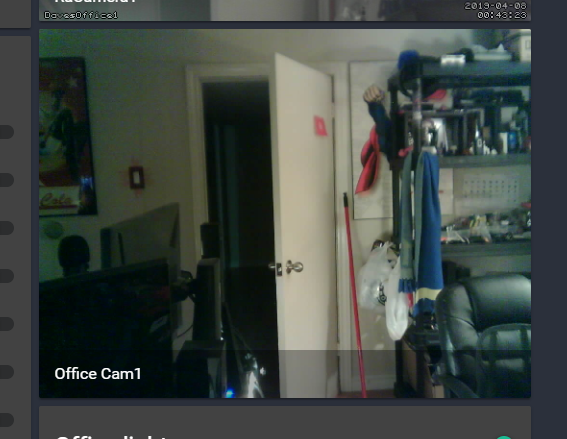
I am using a picture-entity card to display the camera, with a tap action to watch its stream.
camera_image: camera.office_cam1
entity: camera.office_cam1
show_info: true
show_state: false
tap_action: dialog
title: Office Cam 1
type: picture-entity
Conclusion
I hope you enjoyed my little project, and I do apologize for not being able to do a more step-by-step tutorial, but that would require many, many steps from picking hardware to installing operating systems etc. etc. As this is my first real blog post, on my first real blog, do expect that I will dive further into these topics, using this as a "here is the conclusion now let's work from the beginning until we reach it" approach. Many thanks to the Authors and Contributors of all the open source projects I have glued together to make my dreams of being the real life Tony Stark possible. Hope to see you again :D